Hey there! As a supplier of 7 inch UART displays, I'm super excited to share with you how to program these nifty devices. UART, which stands for Universal Asynchronous Receiver-Transmitter, is a common communication protocol used in electronics. It allows data to be sent and received between devices in a serial manner.
Understanding the Basics of a 7 inch UART Display
First things first, let's talk about what a 7 inch UART display is. It's a display screen that's 7 inches in size and uses the UART protocol to communicate with other devices, like microcontrollers or single-board computers. These displays are great for all sorts of applications, from DIY projects to industrial control systems.
The main advantage of using a UART display is its simplicity. You don't need a complex interface to get it up and running. All you need is a way to send and receive serial data, and you're good to go.
Requirements for Programming
Before you start programming your 7 inch UART display, you'll need a few things:
- A 7 inch UART Display: You can get one from us! Check out our 7 inch UART Display for more details.
- A Microcontroller or Single-Board Computer: This will be the brain that controls the display. Popular choices include Arduino, Raspberry Pi, and ESP32.
- A Power Supply: Make sure you have a stable power source to keep your display and microcontroller running.
- Cables and Connectors: You'll need cables to connect your microcontroller to the display. Usually, you'll need a UART cable or a USB-to-UART converter.
Step-by-Step Programming Guide
Step 1: Set Up Your Hardware
The first step is to connect your 7 inch UART display to your microcontroller. The exact connections will depend on your specific display and microcontroller, but generally, you'll need to connect the TX (transmit) and RX (receive) pins of the UART interface.
Here's a simple example of how to connect an Arduino to a 7 inch UART display:
- Connect the TX pin of the Arduino to the RX pin of the display.
- Connect the RX pin of the Arduino to the TX pin of the display.
- Connect the ground (GND) pins of both the Arduino and the display.
Step 2: Install the Necessary Libraries
Most microcontrollers require libraries to communicate with the UART display. For example, if you're using an Arduino, you'll need to install the SoftwareSerial library if your microcontroller doesn't have a built-in UART interface.
To install a library in the Arduino IDE, go to Sketch > Include Library > Manage Libraries, then search for the library you need and click Install.
Step 3: Write the Code
Now it's time to write the code that will control your 7 inch UART display. Here's a simple example of how to send a message to the display using an Arduino:
#include <SoftwareSerial.h>

// Define the RX and TX pins for the UART communication
SoftwareSerial mySerial(10, 11); // RX, TX

void setup() {
  // Initialize the serial communication with the computer
  Serial.begin(9600);

  // Initialize the serial communication with the display
  mySerial.begin(9600);

  // Wait for the display to initialize
  delay(1000);
}

void loop() {
  // Send a message to the display
  mySerial.println("Hello, 7 inch UART Display!");

  // Wait for a moment
  delay(2000);
}
In this example, we're using the SoftwareSerial library to create a virtual UART interface on pins 10 and 11 of the Arduino. We then send the message "Hello, 7 inch UART Display!" to the display every 2 seconds.
Step 4: Upload the Code
Once you've written the code, it's time to upload it to your microcontroller. Connect your microcontroller to your computer using a USB cable, then select the correct board and port in the Arduino IDE. Click the Upload button to send the code to your microcontroller.


Step 5: Test Your Display
After uploading the code, your 7 inch UART display should start showing the message you sent. If it doesn't, double-check your connections and make sure your code is correct.
Advanced Programming Techniques
Once you've got the basics down, you can start exploring more advanced programming techniques. Here are a few ideas:
Displaying Graphics
Most 7 inch UART displays support basic graphics commands, like drawing lines, circles, and rectangles. You can use these commands to create custom user interfaces or visualizations.
Reading User Input
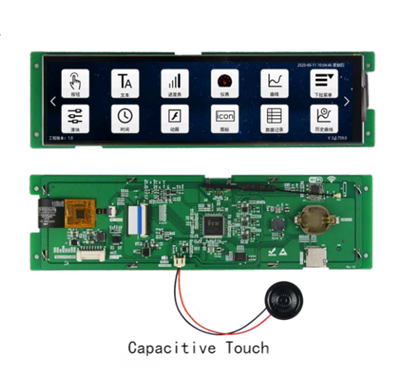
Some displays also support touch input. You can use this feature to create interactive applications, like touchscreen control panels.
Communicating with Other Devices
You can use the UART interface to communicate with other devices, like sensors or actuators. This allows you to create more complex systems that can interact with the real world.
Other Sizes of UART Screens
In addition to our 7 inch UART display, we also offer 15 inch UART screen and 12.1 inch UART screen. These larger screens are perfect for applications that require a bigger display area, like industrial control systems or digital signage.
Conclusion
Programming a 7 inch UART display is a fun and rewarding project. With a little bit of knowledge and some basic programming skills, you can create all sorts of cool applications using these displays.
If you're interested in purchasing a 7 inch UART display or any of our other products, please feel free to reach out to us for more information. We're here to help you with your projects and answer any questions you may have.
References
- Arduino Documentation: https://www.arduino.cc/reference/en/
- Raspberry Pi Documentation: https://www.raspberrypi.org/documentation/
- ESP32 Documentation: https://docs.espressif.com/projects/esp-idf/en/latest/